James and I love to have this with nachos and refried beans on the weekend. We call it our Saturday lunch.
Quick Guacamole
Ingredients:
2 ripe avocados
1/4 cup chopped onion
half a Roma tomato, chopped
1 tsp lemon juice
1 tsp extra virgin olive oil
1/2 tsp garlic salt
Peel avocados and remove pits. Mash with a fork. Add chopped veggies, lemon juice, olive oil and garlic salt. Stir. If you want it to be spicy you could probably add some chillies.
Mmmm...
Serve right away. It will turn dark brown if you leave it out.
Tuesday, January 31, 2012
Friday, January 27, 2012
Avocado Frosting
Frosting is so sugary. :( I've wanted to make a less sweet version of frosting for a long time, but couldn't think of a way to get it thick enough (short of loading it with corn starch). But a while back I found a recipe for vegan ice cream. With a few changes it made a fairly good frosting. Thick, pudding-like texture, creamy, and all that. I liked it. So here's the recipe:
Ingredients:
2 ripe avocados
1/3 cup unsweetened cocoa powder
1/4 corn starch
1/2 cup honey
a pinch of salt
1/4 cup almond (or other) milk
1 tsp vanilla
optional: 1/4 powdered sugar (if you are not satisfied with the sweetness)
Peel avocados and remove pits. Smash in a stand mixer or food processor until smooth, then add other ingredients. Add extra almond milk or corn starch to adjust the consistency if necessary. Watch out for little green lumps of avocado hanging out in the frosting. It doesn't affect the taste, but it does look a little weird.
Spread onto a cake, or graham crackers, or whatever you like to eat with frosting.
I recommend storing it in the fridge over night before use to let the flavor deepen.
Thursday, January 26, 2012
Good-For-You Banana Muffins
My bananas were getting kinda brown so I whipped these up yesterday. They were really yummy! In fact, there isn't a single one left (No, I didn't eat them all by myself). I forgot to take a picture, but next time I make them I will be sure to snap a few shots. Not that they were super exciting to look at, or anything.
Ingredients:
4 very ripe bananas
3 eggs
2 cups of whole wheat flour
1/4 cup of olive oil
1/2 cup of honey
1 tsp aluminum-free baking powder
1 tsp baking soda
1/2 tsp salt
1 tsp cinnamon
1/2 tsp nutmeg
Preheat oven to 350°. Mash bananas. Unceremoniously dump all ingredients into one bowl and mix...blah, blah, blah...I won't bore you with the details. I'm sure ya'll know how to mix muffin batter. For fun you can also sprinkle some cinnamon and sugar over the top before you bake them.
Pour into greased muffin pan and bake for about 25 minutes or until a toothpick comes out clean (or mostly clean, if you didn't mash the bananas all the way like me) when inserted into the muffins.
Makes about 18 muffins.
Enjoy!
Message in a bottle

For this project you will need:
A small glass vial
Something to put inside it
Heavy wire
Pliers
Wire cutters

Cut roughly 10" of wire and carefully bend it into this shape:

Make sure the loops on the ends are pointing outward.
Twist a new piece of wire into a small spiral the size of the bottom of your glass vial. Pressing the spiral against the bottom of the vial gently twist the long end of the wire around it (I recommend getting it started by twisting around your finger first so you don't break the glass). Wrap it snugly all the way around the top.

Cut the wire about 1" away from the vial, bend it upward and form a loop. Connect it to the loop on the shorter end of the wire piece you bent earlier.

Fill your vial. I filled one with tiny sea shells. But here is something even cuter:

:)

Up-cycled shirt
I've seen these adorable things on the Internet and have wanted to give it a try. This one is for my mom.
You will need:
A long sleeve shirt
Felt
Beads
Thread
A needle
Scissors
Start by finding an old shirt from your closet which you do not wear often, or don't like, or buy one at a thrift store. A stretchy knit is nice, but you could do this with a button-up blouse just as easily. It will just be stiffer and have less drape. This one is a very drapey knit. I got it at Value Village for about $6.
If your shirt came from a thrift store wash it before up-cycling.

First things first: lop off the sleeves. Make sure you cut them the same length on both sides.
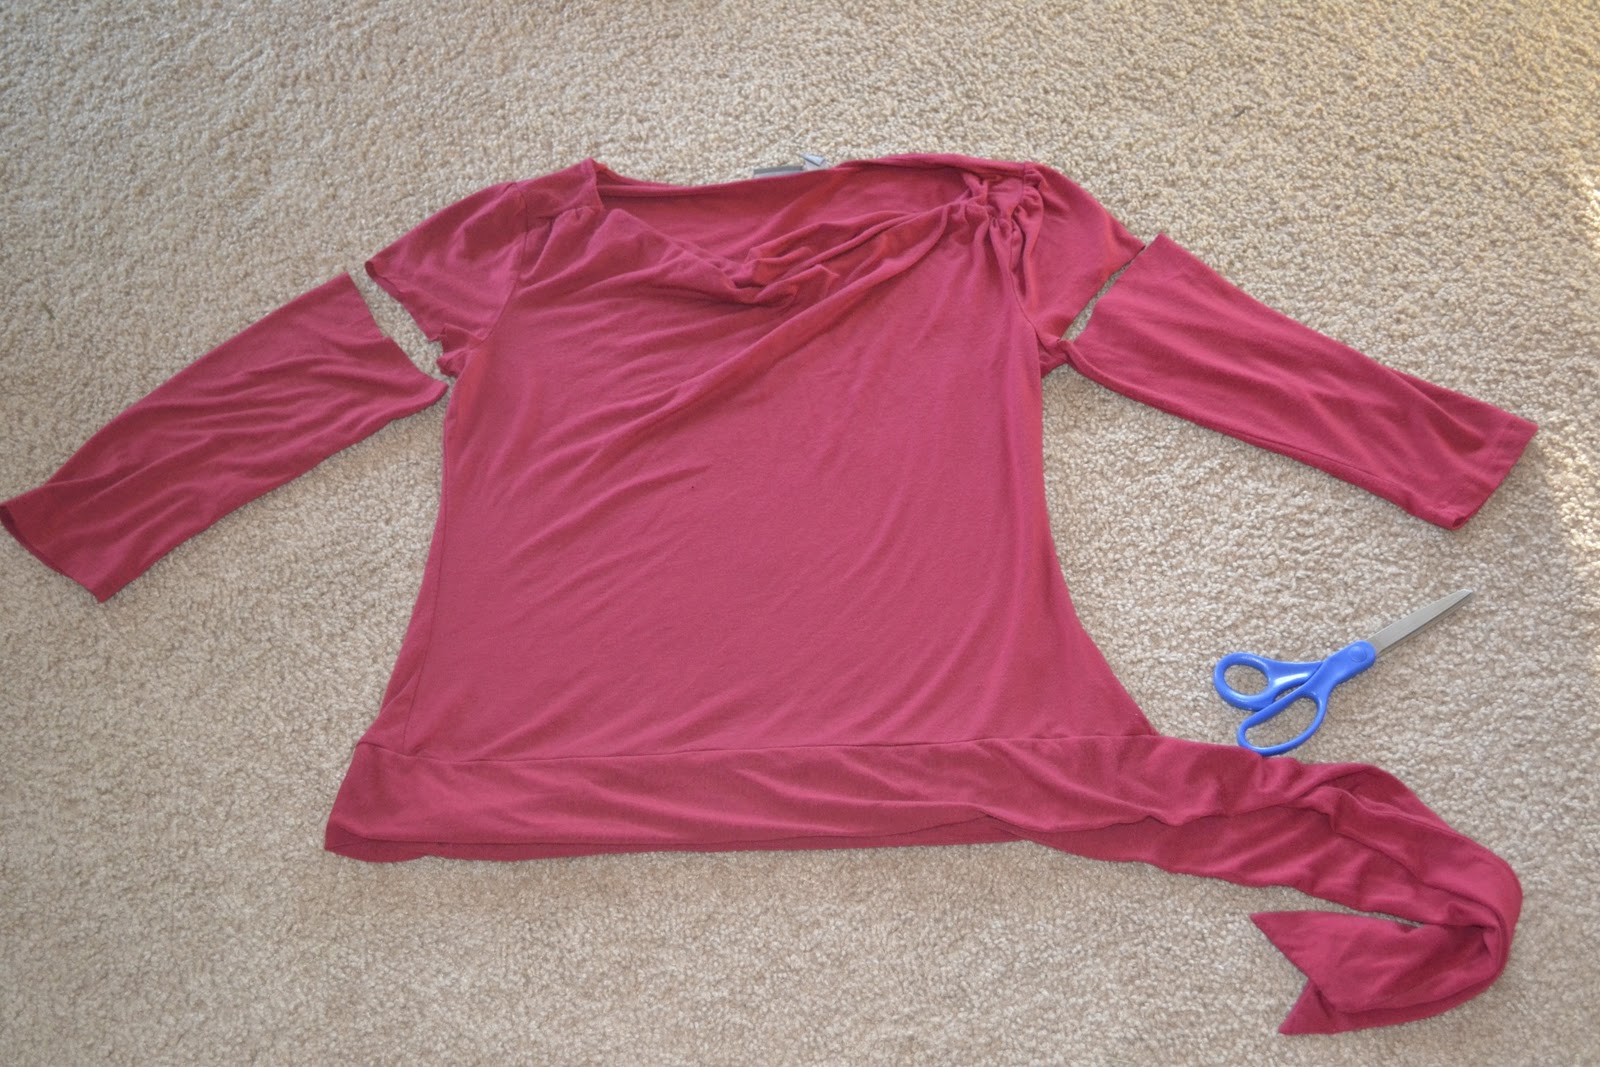
Turn the severed sleeves inside out and cut out the surged seam.
Plan your attack. If your shirt already has embellishments (like the tie on the left hip and the draped neckline of this one) then take those into account when planning your design, using them to your advantage. For example: because my shirt has a loose, hanging neckline I don't want to put anything too close to the edge of the neck, because it will just get lost in the hanging folds of fabric. I also don't want to add anything that requires too much structure to hold it in place.
These sleeves were 3/4 length, so I had less fabric than I otherwise would have, but here is a way to get nice long strips out of short pieces of fabric:
Lay your sleeve flat and cut out a gumdrop shape.

From this piece cut another gumdrop.
And another.
And another.
This will give you three horseshoe shaped strips. These were perfect for my project.
Do the same with the other sleeve.
Take a strip and sew the two ends together (starting from the widest edge and working inward) like this:

Pull it snug.
Next, take a small circle of felt and stitch it into the center of your flower.
For some bling I added a giant red plastic bead on top of the felt.
For the smaller flowers I added a few seed-like rustic glass beads to the center.
Now, decide where your flowers should go and start sewing them on!

Pretty!
Because these flowers are so big and loose they wouldn't stay open.
I gently tacked the large flowers open at four points along the upper half, three points for the medium flowers, and once for the small flowers to keep them open and beautiful.

While embellishing the right side I noticed that the weight was not evenly distributed because the flowers were pulling the neckline down. To regain balance I added a couple flowers on the left side, slightly higher than the right . It worked!

Here it is! Good luck with your up-cycling!
Subscribe to:
Posts (Atom)